CNC Router Build – Post 2: Lessons Learned and Design Begins

Published on by Mike  (Leave a comment)

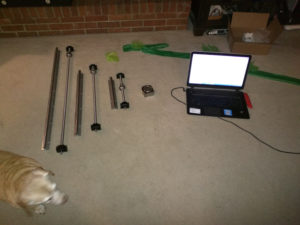
Kimmy Inspecting My Work

As I begin then process of the CNC Router build, I am going into new areas that I haven’t had much experience in. A big example is metals. While it is possible to build much of the machine from wood, and there are many good examples of CNC machines out there, for best rigidity going with metal is the best way to go. Obviously the rails and ball screws are steal, but other components are going to be made from aluminum. Part of what goes into coming up with a design to build this machine is researching materials, and more importantly the cost of these materials. This has involved considerable research, from Google searches to eBay. It really pays to do this, as one site may have a component for one price, and another for 50% less. For example, I will need two lengths of angle aluminum. After doing searches on the web, eBay, and a few other metal vendors, I have found the best price, after shipping, is 80/20.

While the materials is an important component, getting the right measurements is critical. As I mentioned in my first post, I already bought the rails and ball screws, along with the bearing guides, mounts, and other parts.  During the process of attaching the ball screws to the mounts, I discovered that one wouldn’t go on.  In my effort to work on this, I decided to remove the nut from the screw.  BIG mistake.  The reason they call these ball screws isn’t because the threads are rounded.  They are rounded so that ball bearings can travel inside of them.  I did not discover this until I had the nut partially off, and ball bearings started coming out.  I quickly grabbed a magnetic bowl to collect the bearings.  After some advice from Jason, watching a couple YouTube videos, and about 2 frustrating hours, I was able to get successfully get the nut repacked.  Needless to say, I will not be making that mistake again!  Once I got the burs filed off, I finally was able to get the ball screw rods assembled, and I got my measurements, and recorded them in OneNote.  I go over this a bit in the video I posted as well.

I am utilizing OneNote considerably for this project.  As I mentioned, I am reaching out to new areas where I am finding that there is a LOT of information to digest. Simply put, I can’t keep track of it all in my head.  So I am doing a lot of documenting along the way, including everything from measurements to tracking my orders, to how much I have been spending, all kept in a OneNote notebook.  
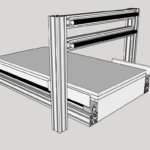
Gantry Design Option 1
Gantry Design Option 2

I have begun designing the machine in SketchUp.  The 3D Warehouse is absolutely invaluable for this.  All the the rails components are in there, which has allowed me to work on an accurate as possible design.  I am looking at using some 80/20 components.  They have all their profiles in various CAD formats, including SketchUp, available for download.  On top of that SketchUp does a GREAT job of going between metric and imperial measurements.  At this point, I have the main platform designed, as well as most of the gantry.  My next update will go in to my next steps of the design.

CNC Router Build – Post 1: Research & Planning

Published on by Mike  (Leave a comment)

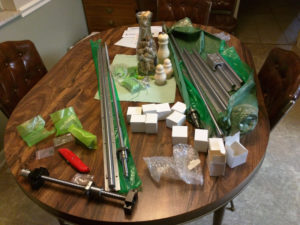
CNC Router Rails, Screws, and Hardware

Before I get started, I want to put out a big THANK YOU to Jason Beam.  He has provided an absolute wealth of information and inspiration to help start to make this project a reality for me!

This is likely going to be one of the most complex projects I have undertaken to date.  However, the process to build this project is the same as any other project.  Every complex project is broken down to individual tasks and challenges to be solved.  Some will take more time and effort than others.  Like any woodworking project, this build is done one step at a time, until the end result is a working CNC router.  Something I am doing a little different with this build, as I am using Microsoft Onenote to keep track of the various aspects of the build.  Everything from part specs, to the number of screws needed.  This is going to help keep my head straight as I move along on this project.  It will also help provide some of foundation for future posts too!

The first thing I needed to determine, was how big of a CNC router did I want.  First I have to be realistic, as much as I would love to have a large machine, I simply don’t have the room for one that is too big.  So the first decision I made was an approximate size machine I wanted.  In my case, I am looking to build one that is approximately 3’x2′.   While it is not real large, looking at the types of projects I often take on, I don’t do a lot with sheet goods, and I don’t typically have work pieces that exceed that size, so this really should be sufficient to my needs.  With the size determined, I can start the real planning.

Before I can really start designing the machine, I need to determine how the router is going to move.  This took a significant amount of research, as honestly I had no clue where to start, and if the was even feasible for me.  Think back to your geometry and algebra classes, a CNC works on the X, Y, and Z planes.   Each direction direction or plane is referred to as an axis.  All CNC routers have at least 3 axes, which is what I am building.  More complex machines can have more than 3, but for now that is more advanced then what I am willing to take on.  With getting each axis to move, it is imperative that they move in a stable, and precise manner, while supporting the weight of the router, gantry and other moving parts.  This actually is a lot of mass to move.  Any extra movement results in reduction in precision of the machine.  A few basic Google searches reveal many solutions to accomplish this, from home grown options to various rail and screw systems, each with its own pros and cons.  With the help of Jason and his wisdom, I did go with a more premium option, with using SBR20 linear rails.  I was able to save quite a bit of money by ordering a rail and screw kit through a company that works through eBay.  The kit I ordered came in very close to the size I was looking for, and included all the mechanical elements needed to make this move well.  This includes the SBR20 linear rails, the linear blocks, C7 ball screws, and all the needed mounting hardware.  These parts are heavy duty, and will help form a strong foundation for my machine.

It may seem a little backwards to start buying parts before drawing up any plans.  However, there is a method to my madness here.  Right now I have several mental images of how I want this to look.  Beyond that, I really needed to see how the rails and screws are put together.  This will allow me to move them around on the floor, and get measurements from them.  This will allow me to start drawing up the designs in Sketch Up.  

My next few posts will go into further details of planning and design.  In the meantime, feel free to post any questions in the comments, and I will answer them with the best of my ability.  Till next time, happy and safe woodworking!


Back from the Dead, a New Project, and Other Shop Musings

Published on by Mike  (Leave a comment)

What?!?!  A new post?!?!  It’s been over a year!  It has been far too long since I have written a new post for the blog.  Fear not, I have still been in the shop, making stuff, however most of the documenting of my projects has been on social media.  While that does give brief glimpses into what is going in my shop, it doesn’t go in to near the detail of what I have written about on the blog.  

First off, a status on videos.  I have footage of several projects that I have not yet edited, that someday I will edit them and release them.  The biggest hold up for the video is the editing process.  Unfortunately the laptop, or more specifically the video car in the laptop that I currently own is simply not up to the task of editing video in an efficient manner to get them out on a regular basis.  Until I get a better laptop, my video production is on hiatus.  

In the meantime, I do want to get my blog back up and going again, especially as I prepare for an upcoming project.  That project being a home made CNC Router!

Why a CNC?  First off, do not think for one minute that I am giving up traditional woodworking, as that is simply NOT the case.  I look at it is the next step in my journey as a woodworker.  Just as the table saw, jointer, planer all are tools that simplify or make possible certain tasks, so to is the CNC.  For example, one of the things I want to start doing is bent laminations.  A CNC can help me make the bending forms that are needed.  This will give me more time doing the actual woodworking, rather than spending time making jigs.  Also, I am a computer guy.  My day job isn’t woodworking but rather it is Information Technology, and as a result I am a bit of a technology enthusiast.  Getting a chance to build a piece of technology for me is exciting.  A big reason I am coming back to the blog is that I am going to document the process of the build.  I am debating on whether I will shoot video or not.  As I mentioned video production is not my priority right now, and if I do shoot video, it will probably be awhile before I get it edited.  

Finally, before I sign off, I did make another change to the technology I use in my shop.  As I have written about in the past I keep a computer in the workshop.  I recently replaced that computer with a Raspberry PI 3.  So far, I have been very impressed with what its capabilities are.  Since it is pretty much always running, I now stream my shop much more regularly when I am working.  Plus, getting to play with Linux again has been a lot of fun.  I did just say I am a computer guy(coughgeekcough)  🙂

That is it for now, I will have the first CNC post out shortly.  I also have a couple posts that I started last year, that I will try to finish up and get published as well.  Happy and Safe woodworking!

Handworks 2015 and The Studley Exhibit – Part 1

Published on by Mike  (2 Comments)

Handworks Banner Probably the biggest issue about my hiatus from writing on the blog is that I never wrote about my visit to Handworks 2015 in Amana Iowa, and the Studley display that was in nearby Ceda r Rapids Iowa.  Well, now that I am writing again, I am going to correct this issue!

The trip was simply flat out awesome.  It was about a 7-8 hour drive for me, and I stayed neared Amana Iowa for a couple days to attend the various events.  First and foremost, I met with several friends that I know from The Wood Whisperer chat room, Karen, Jason, and Kip.  While we have gotten to know each other very well over the last few years, this was our first time with all of us meeting at the same place.  It was really great getting to meet up with these folks!

Waiting in Line For the Handworks 2015 to Open

The show itself is still a very young show.  It is put on by the Bench Crafted people every other year, with the first year being back in 2013.  Handworks 2015 was the second time this show was put on, and I believe in 2017.  As the name implies, the show is all about traditional woodworking hand tools.  The tools that are on display and available for purchase range from antique tools to high quality mass produce tools, such as Lie-Nielsen and Veritas, boutique tools, and everywhere in between.  The show is put on for two days, and I needed every bit of that to really shop around!   The line that formed before the show opened was amazingly long!  It was incredible to see the amount of woodworkers who came to this show.  In my mind this is proof that our craft is most definitely alive and well!  The time spent in line actually went fairly quick as it was a great opportunity to talk with other woodworkers.

Vendor_Crowd
Many Great Vendors

Normally when I go to a woodworking show, I spend the first couple hours or so exploring the various booths to see what is out there before I made any purchase decisions.  While I did do this, I did actually deviate from this a little bit.  One item that I have had my eye on for several years now is Bench Crafted’s Moxon Vise kit.  Once the doors opened on the first day, I went directly to that booth, and immediately made that my first purchase! (Don’t worry, there will be more on that in future posts)  The next thing I did was immediately jump into another line.  The month before I was at the Lie-Nielsen Hand Tool Event at Popular Woodworking magazine.  Besides Lie-Nielsen, Lost-Art Press was one of the vendors at that show, and I purchased “Calvin Cobb: Radio Woodworker” by Roy Underhill.  This line I was standing in was the chance to get to meet Roy and to have him sign my copy of his book!  After that, I was able to explore around the show.  The show itself was in three buildings around the Amana Colonies.  Not only were there tool vendors there, but there were demonstrations all around. There was an incredible amount there too learn from!

Amana_Workshop
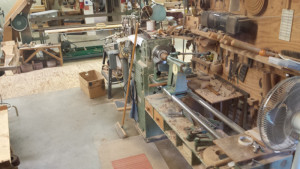
A Small Part of Amana’s Huge Shop

The Amana colonies has a woodworking shop that they produce custom made high-end furniture.  After the workers close down for the day, they do provide tours of the shop, which I was able to take.  This was actually a fascinating tour to see the range of tools that professional woodworkers use.  It is mostly traditional power tools, but they have also have a couple CNC controlled machines.  It was really interesting to see how they integrated modern and traditional tools and methods together.


Roy_Talking
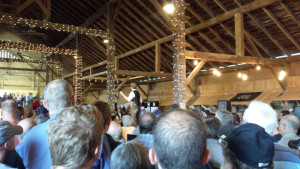
Roy Getting the Crowd Going

The second day of the show started with a speech from Roy Underhill.  This was actually the second time I have seen Roy speak in public.  One thing I can tell you is that he is absolutely phenomenal speaker.  He tells a great story that is both hilarious and informative.   His speech at handworks was no exception!  After his speech, I spent more time shopping around, until it came time to travel to Cedar Rapids to see the Studley Tool Chest and Workbench.  I am going to write more about that in my next post.

PeterRossCompass
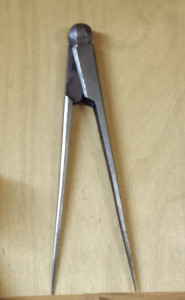
Compass Made By Peter Ross
Winner
I Won!

The tools I ended up purchasing, besides the Moxon Vise, included a couple rasps from Tools For Working Wood, a burnishing kit from Czeck Edge Tools, and a dove tail saw from Lie-Nielsen.  However, the most memorably tool I was able to bring home wasn’t one that I purchased, but rather I won!  The door prizes at the show where amazing.  In my case I won a 6” compass that was made by Peter Ross.  If you watch the Wood Wright Shop, that name may sound familiar.  He is the black smith that Roy often has on his show!  This compass now has a prominent spot in my hand tool cabinet.  I will have a video coming out at some point in the future.

Over all, the show was nothing short of awesome!  It was a great time to meet up with friends, learn some new skills, and of course to bring home new tools!  I am looking forward to writing about the Studley Exhibit in my next post!

Breathing Easier – Shop Air Filter Installation

Published on by Mike  (Leave a comment)

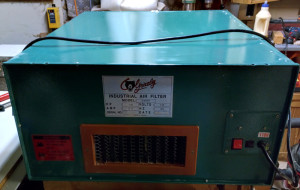
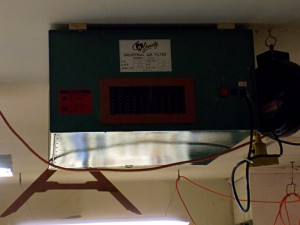
air filter
Air Filter

One of the constant battles that any woodworker should be fighting is keeping the air quality of the shop as clean as possible.  When it is warmer than 60 degrees outside, I typically have the garage door open, so I have pretty good air circulation going on.

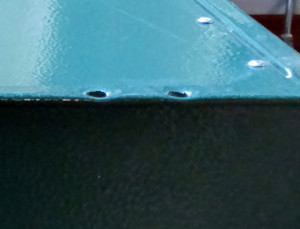
Air Filter Mounting Holes

However, I do work as much as I can during the cold months, so the shop is closed up.  As I am working in the shop, even when using dust collection, quite a bit of dust does get airborne.  So to help this out, I recently purchased a used Grizzly air filter via Craigslist.  It appeared that the previous owner used it on a shelf as the ceiling mounts for it were long gone.  However,

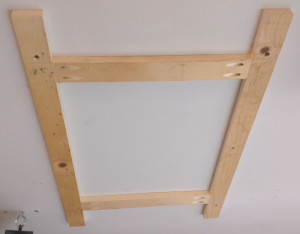
Air filter ceiling bracket
Air Filter Ceiling Bracket

I did want to mount this to ceiling in my shop so that I could get the best possible air circulation in the shop.  The cabinet of the filter did have mounting holes, so I got some measurements, and I constructed a bracket from a pine board I had laying around.  The bracket actually serves two purposes.  First it allowed me to make sure I was able to mount it securely to the ceiling joist, as well as spacing the filter far enough from the ceiling so that it wouldn’t interfere with opening the clips that hold the filters in place.  The
cross pieces are attached simply with pocket screws.  I then found where the ceiling joists were, and attached the bracket with screws into those joists.  With some help lifting the filter to the ceiling, using screws and washers, I attached the filter to the bracket.


Air filter hung
Air Filter Hung on Ceiling

Whenever I am running any machinery, including the dust collectors, I keep the air filter running.  I do notice that it does circulate the air in the shop very effectively, and it does seem the air is cleaner.  As I said, this is still an ongoing battle to keep the air in my shop as clean as possible, and I do have plans to expand on my dust collection even further.  I will write about those as well.