New Table Saw Fence – Part 5 – New Wings

Published on by Mike  (Leave a comment)

Original Posted on November 3rd, 2010

new_wings
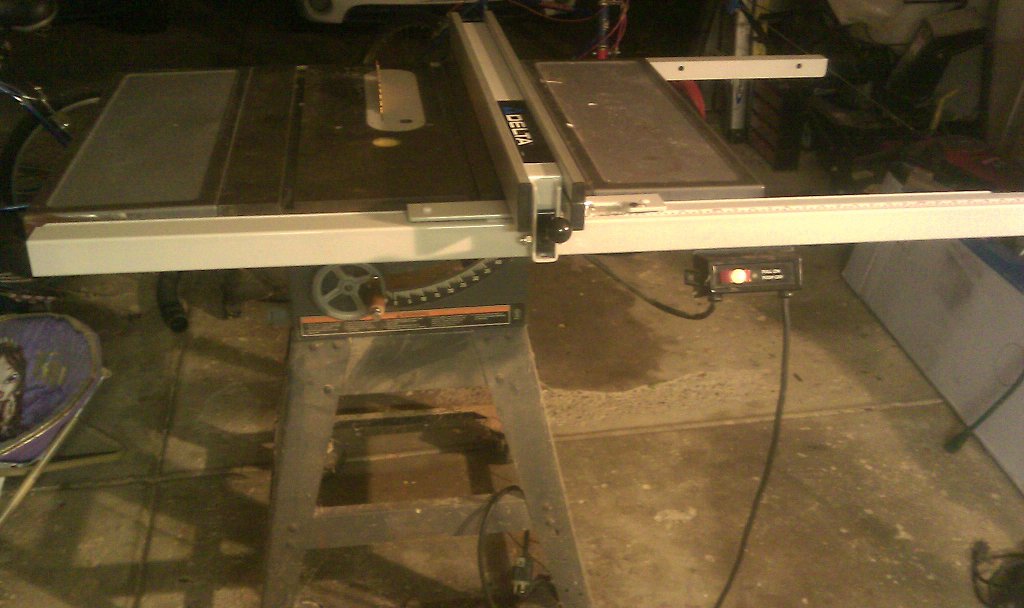
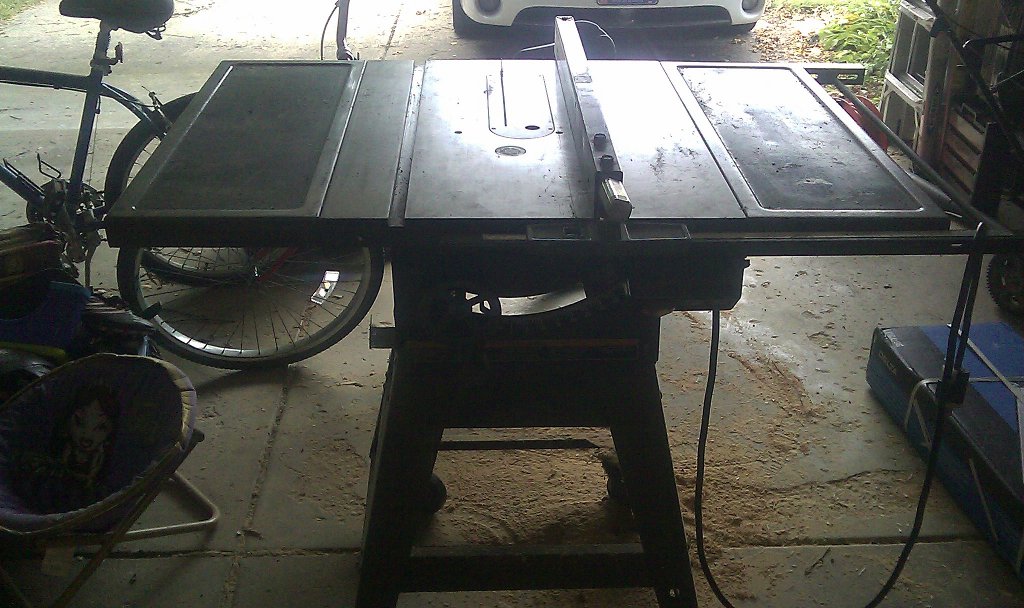
After a couple months of usage, the new fence is worked out great! One issue I noticed immediately was that the old stamped steel wings were no longer stable after removing some of the bolts to make the new fence fit. Plus with the longer rails, I felt like I was missing out on additional work area. So to the solve that problem I made two new wings. The left wing is roughly the same size as the old wing, while the right wing takes full advantage of the new rails.

wing_bottom
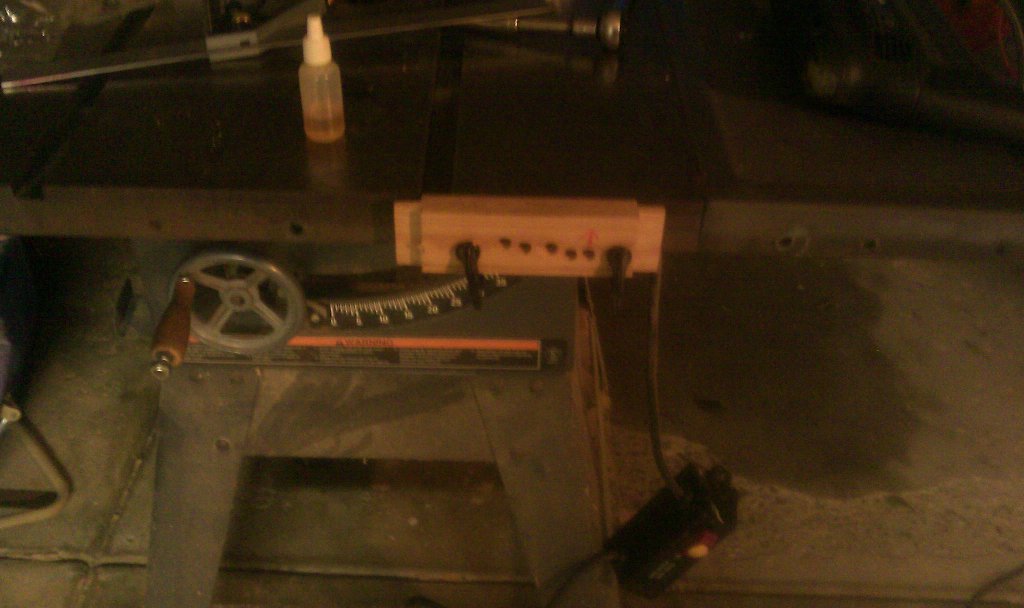
Construction was very straight forward. Looking at the bottom, while fuzzy, should give an idea of how it is constructed. The bulk of each wing is two pieces of 3/4″ mdf laminated together to make a surface that was 1 1/2″ thick. Notice all the screws on the bottom. Before any glue touched the MDF, I predrilled and prescrewed each screw to make the pieces lined up properly, and to make sure that the top piece didn’t lift away from the bottom during glue-up. After glue-up came the edge banding. The edge banding serves two purposes here. First it makes a clean looking edge. Second, and much more importantly, it provides the structure to bolt the wings to the saw and rails. I intentionally made the edge banding wider than 1.5″ and initially attached them proud of the top surface. I only attached two bands at a time using glue and nails. Once each of the bands were attached and the glue was dry, I flushed them up with the router using a flush trim bit. After completing the edge banding, I covered the top of each wing with a sheet of Formica, using contact glue and a j-roller.

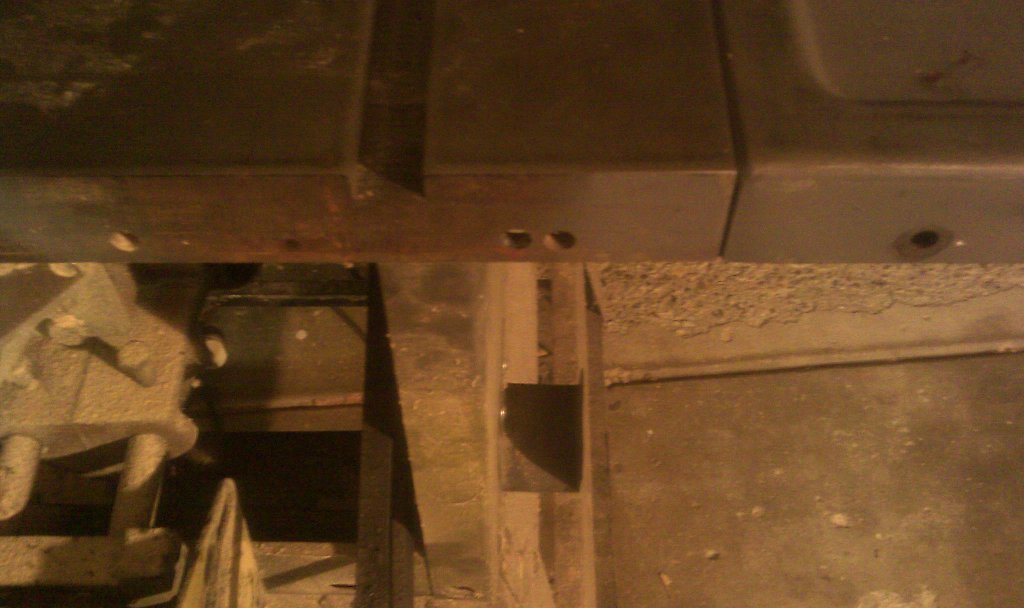
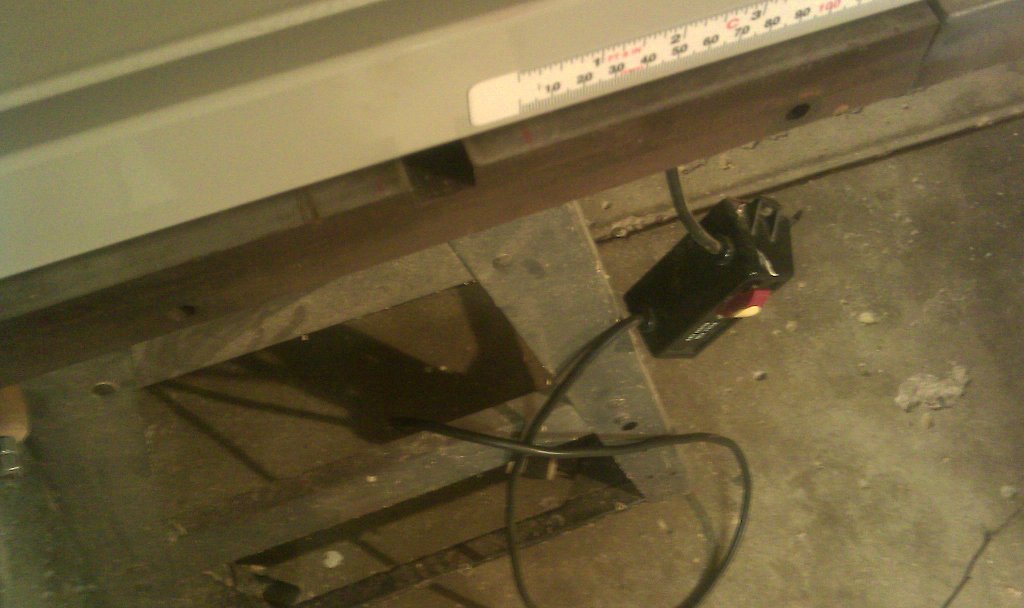
Finally came time for installation, and this was actually the most time consuming part of the project. After getting a wing lined up as close as possible, I would mark the two outer bolt holes. I then drilled the through hole. If you look in the picture around the edge you will see large holes in the bottom. These were drilled using a forstner bit, and then using a chisel and hammer, made a flat surface for the nut & washer to bite into. After cutting each of these (8 in all) a lot of time was spent with lining up with wings. This included widening the through holes with a rasp, tightening and loosening bolts, and finally some brute force with the rubber mallet. After finally getting everything even, I did a final check to make sure all the bolts were good and tight.

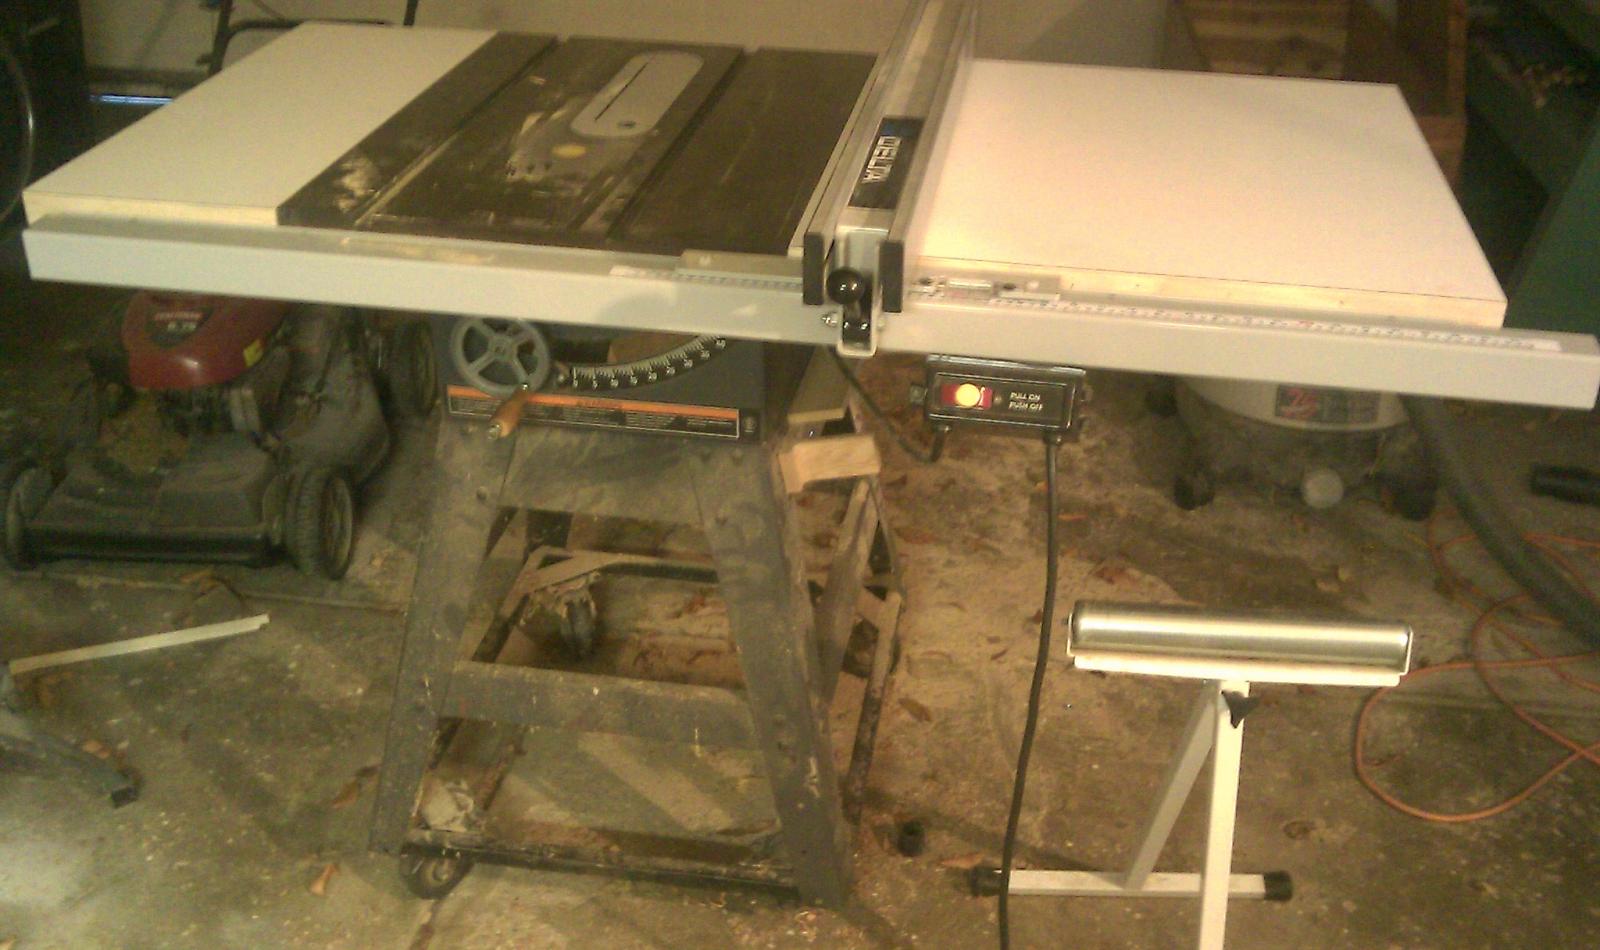
Update 3/6/2013 – I have been using the setup for not quite 2.5 years now.  The wings have worked out fairly well, and do occasionally need readjustment.  The fence has been great!  I do try to keep the guides as clean as possible and well waxed.  The fence still glides as smooth as the day I installed it.  There was a point about a year ago that I thought I was going to have to replace the saw.  Luckily the issue was repairable, and the saw is still useable.  However, if I had to replace the saw, most likely that fence would have been put on the replacement saw.

New Table Saw Fence – Part 4 – Installation

Published on by Mike  (Leave a comment)

fence_doneI didn’t take any further pictures during the install process, except for the final product (as shown) as from this point the installation was exactly as described in the manual and it went in fairly quickly. Much of the time spent was with tuning the fence. Which I did even further the next morning as well, until I was happy with the setup.

One unexpected benefit was the power switch placement. It no longer faces down, but instead faces up. I did move it out a little bit further I was fearful I would accidentally turn the saw off mid cut by leaning into it. However the bracket mounted right onto the angle iron by using one of the bolts that hold the tube rail to the saw.

For the cost of this fence (being less than half of many of the popular high-end fences) I was really impressed with the feel of it. It glides over the rails with very little force, despite it being fairly heavy. The measurement guide is very easy to line up, and leaves very little doubt to the accuracy of the cut. Finally, since it use a similar clamping mechanism to the Biesemeyer, it ALWAYS locks down square. Even though the saw itself is 25+ years old, this upgrade has made the saw feel like it is new.


New Table Saw Fence – Part 3 – This is only a drill!

Published on by Mike  (Leave a comment)

drill_jigBefore I started drilling holes, I did a bit of research on how others had done it, namely drilling holes in the angle iron or into the front and back sides of the saw’s cast iron top.  While many had drilled into the angle iron, I was concerned about revoking the 2 year warranty, and also realized my little bench top drill press was not up to the task of drilling.  I decided it would be much safer to attempt to drill into the cast iron.

While I did not come to the decision of drilling through a 1/4″ of cast iron lightly, I figured I could use a jig to more accurately and more safely get the holes I needed. The other benefit was I was able to use the specialized screws that came with the fence for a more solid fit. I made a drilling guide using a scrap piece of hardwood, the width being about 1.5″, which matched the width of front and back of the saw. I marked as best I could where the hole should be on the guide, and drilled the guide hole using the drill press. From there I used trial and error until I was able to drill a hole that I could stick a bolt through to a whole in the saw, and the tops would be flush. You can see in the picture where I marked the successful one. I then lined up the hole to the red mark on the table and clamped it down good and tight. You will also note in the picture the bottle of machine oil. I coated the drill bit with the oil before I started to drilling, and several times during drilling.

new_holeFinally, after taking a good deep breath, I started to drill. The first hole took about 5 minutes to cut through. Now, this is the first time I have drilled through cast iron. I was therefore taken by quite the surprise when the drill bit finally cut all the way through, and instead of sliding through like drilling into wood, the bit caught in the cast iron, yanking the drill out my hands. I was very fortunate that I did not get hit by anything, and nor did the drill or bit break in this process. The second hole I drilled took quite a bit longer to drill as I did not want this to happen again, with potentially more disastrous results. I did discover that just before the drill bit broke through there is a lot more vibration as a warning to slow way down and therefore was able to drill through this time without incident.

For the back rail, I decided it was best to use one existing hole and only have to drill one more hole. With the difference being only one inch I was not really losing anything by having both rails being lined up. The third and final hole I was able to drill the quickest, and was able to drill through without incident.

New Table Saw Fence – Part 2 – Demolition & Planning

Published on by Mike  (Leave a comment)

old_rails_goneBefore I could start the install I had to remove the old fence. Despite the bolts for the old fence rails being a little rusty, they came out fairly easily. I found however that the wings had bolts that had rounded heads that needed to come out as well, otherwise the angle irons for the new fence would not be able to sit flush to the TS. Out 9 of these bolts 1 came out easily. Using some WD-40 and slotting the bolt heads with the dremel, I was able to get 6 more out. The last two….. Well they were a bit stubborn. The picture speaks for itself as to what it took to get those suckers out. (Fear not, none of theses tools were used anywhere near the cast iron table…. yet)

new_fence_planningAt this point, if this had been a Delta table saw, this fence would have very easily bolted up to the saw. However, since the saw is a Craftsman, none of the holes in the saw lined up with the holes in the angle iron. I could potentially use the closest matching hole, but the tape measure would be about an inch off. Therefore I needed to drill a few new holes, I just needed to figure out where. First thing I did was raise the blade up so that it was taller than the new fence, and placed the fence right against the blade. Looking at the indicator line on the fence indicated approximately  where there rail needed to lined up so zero would be within the adjustment zone of the scale. I marked the position on the saw using a red china pen.  Next I screwed the tube rail to the angle iron, and then aligned the zero point to the red mark on the saw.  From there I was able to mark the hole positions in the table saw top based off the positions in the angle iron.  I then knew where I needed to drill.

New Table Saw Fence – Part 1

Published on by Mike  (Leave a comment)

Back in September of 2010, before I had even thought of starting a blog, I did a write up on one of the woodworking forums about installing the Delta T-2 Fence on my Craftsman Contractor saw.  With what I am trying to accomplish on my Blog, I thought it would be relevant to repost it here.   I have revised and cleaned up each post so that it fits better in a blog setting, as well as make the dates and timelines appropriate.  The photos are not the best, and often dark.  Since I did this install, I have gotten a better camera and the lighting in the garage/shop area has been improved.

Originally Posted On September 7th, 2010

As mentioned in the safety thread, I ordered a Delta T2 36-T30 fence system for my 25 year old Craftsman Contractor saw. I bought a Craftsman Contractor table saw for $100 via craigslist earlier in 2010, and overall was happy with the saw, except the fence was stock as it was shot. (please note, I had no expectations at getting an older table saw with a good fence at the time of purchase) As much as I would have liked a Biesemeyer or Incra fence, the T2 @ $155 (that is including shipping) it seemed liked a smart purchase for the saw.

I am breaking this down across multiple posts so that I can better show and explain the overall process, especially since there is a few challenges to installing a Delta fence to Craftsman table saw.

The first picture is the before picture. As you can see the fence would only go right of the blade. Honestly it wasn’t that big of a limitation, but there are times when having the fence to the left of the blade is useful. Also the power switch points down towards the floor, which can make it hard to get to when trying to turn the saw off. The second picture has all the T2 Fence parts laid out for inspection.

original_fence new_fence_unboxed